Translate

Wednesday, January 13, 2016

Wish Flower (3 sizes pattern and tutorial) now on Craftsy


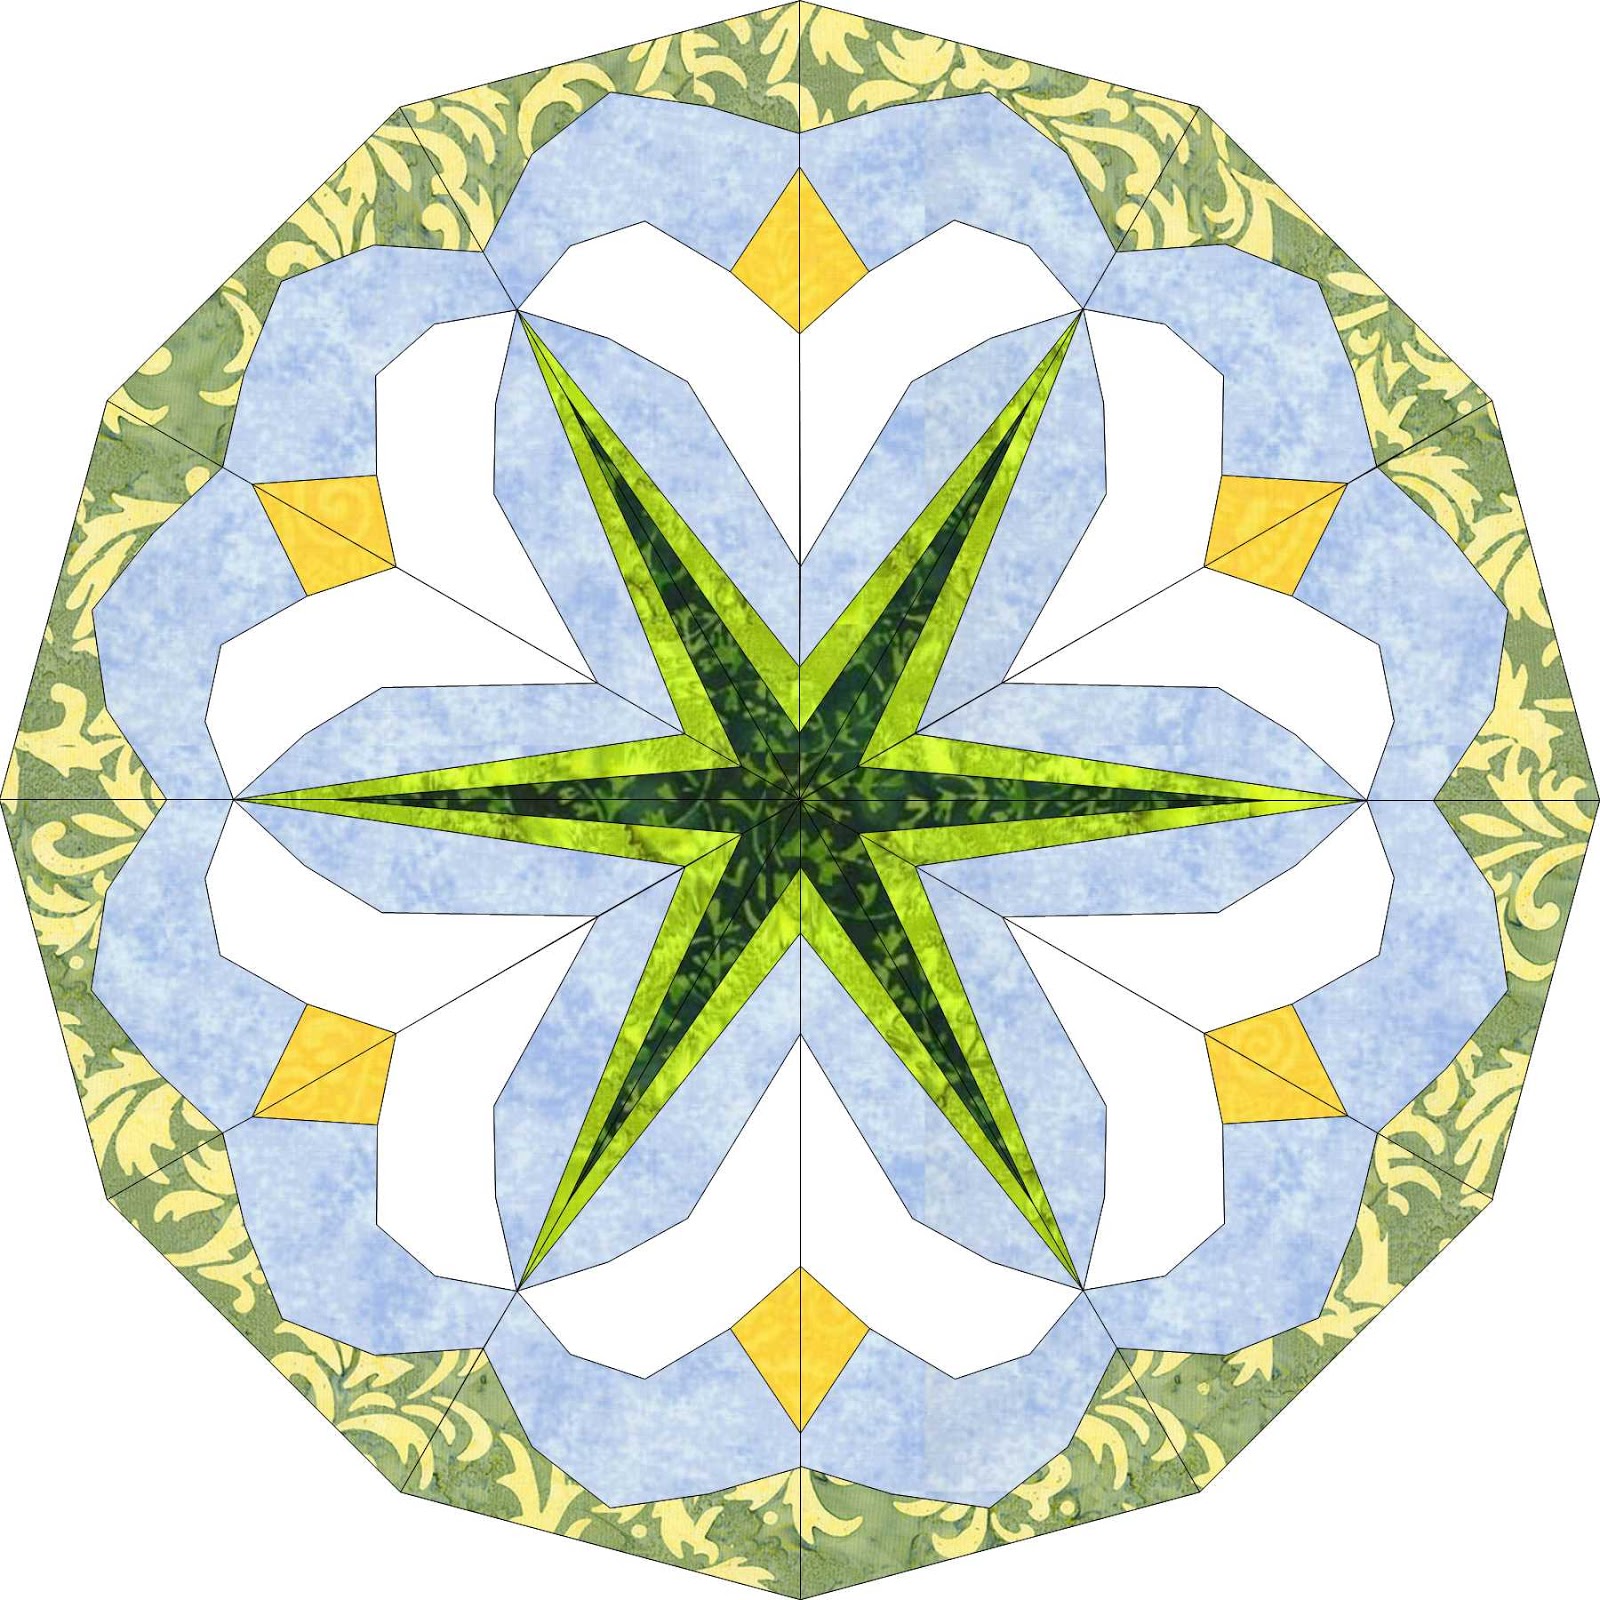
                Wish Flower is now on Craftsy in three different sizes - 12", 24" and 36" in diameter.


Hexagons have endless possibilities! It's not only traditional Grandmother's flower garden. Hexagon can be also broken into multiple pieces from the center making amazing layouts depending on different color combinations. 
In this tutorial I will explain how to work with this kind of pattern and how to put all these pieces together. I will also give you a tip how to eliminate the hassle of sewing multiple tine pieces in center (you can simply replace 4 of them by one!). 
I will also help you with the layouts, will show you how you can place several hexagons to make a quilt or table topper and how you can enlarge the size using sashing and borders.
In this tutorial I will also offer you 10 additional layouts and color combinations to help you visualize the finished product. You will be amazed how the changes in layout and colors can change the whole view and visual perception of these magic flowers! And of course, you can use your own color palette with this pattern! I will be glad to see your finished items here on Craftsy, on Facebook or even in personal message or email. As I have already mentioned - this block has endless possibilities!
Enjoy!
And Happy sewing!
Natalie Quiltessa


Tuesday, January 12, 2016

Friday, January 8, 2016

project in progress...

Look what I've done today!

I called this one Chocolate paradise.

And this one - Blue lagoon.


These are my favorite so far!!!

I got to make tutorial on this one! 

Happy sewing!

Natalie Quiltessa

Thursday, January 7, 2016

Alisa. My first pattern of new series is released!!!

I gave this block my sister's name. 
This is a paper piecing/foundation piecing pattern. If you've never done it before, you can find a lot of video tutorials on this technique to get better imagination how to work in this technique. Basically you just need to know how to make a simple straight stitch on your sewing machine and the instruction will guide you how to manipulate with it and make this beautiful block, which can be used as a single placemat or table topper, or as a beautiful wall hanging or a quilt if you make multiple blocks.

This pattern has multiple possibilities! It can be used as a single piece for placemats or in larger size as a tablecloth. If you choose to combine several blocks together, it can be sewn in a beautiful table topper, quilt or wall hanging.
You can use any kind of scraps and leftover triangular for this technique. You will need 8 colors your choice, 12 pieces of each color. The size of pieces depends on your pattern size preference. Print it out, cut the pieces, lay them out on the fabric and cut. This is a very friendly way of cutting fabrics! You can rearrange triangular again and again to find the best way of layout. 
Multi block folding triangular on freezer paper is my favorite technique. When you iron the pattern onto the fabric, it becomes firm and well stabilized, which makes it easier to manipulate with. Especially when working with small pieces and bias grain in multiple triangular, you don't have to worry about stretching the fabric and not matching points,- they match by default! I like to manipulate with patterns using this technique, the results are always unexpectedly beautiful and eye catching! In this tutorial I will explain how to prepare pattern and fabric for stitching together, how to choose layout for your ready product, how to adjust the size of ready table topper or a quilt.
The tutorial contains 12 pages of instructions which also includes 9 MORE COLOR COMBINATIONS for the same pattern! This will give you imagination how this block can look like in different colors. 


3 other files contain foundation pattern and templates for each piece in actual size. You don't have to print them all out. First, read the tutorial, pick the size you want to make and print out the pattern you need to work with.If you satisfied with the result and want to make the different size in another color, then print another pattern size! 
If you decide to leave it as is, make a sandwich, quilt it and finish with binding! If you want to keep going and make more of these blocks, keep going! But, please, don't leave them as UFOs! They need to be taken care of!
This block is followed by series of other similar type of blocks in my favorite multi block folding triangular on freezer paper technique. To be continued....

Happy sewing!

Natalie Quiltessa

Wednesday, January 6, 2016

My new project is growing!

Practicing every morning! One block a day!
Well, more than that, who cares!

Frappuccino with chocolate chips!
 White lily.


Stella.
 Carmen.


Good old log cabin digitized.

Saturday, January 2, 2016

My new project for new year!

This is what I am working on right now.
I guess this will be my big next project for the year! 
Trying to put all together and right tutorial(s) on it. 


....and much more of different designs.
This can be done in regular paper piecing technique, foundation piecing or my favorite freezer paper technique, which is easier and more convenient to me, plus the pattern can be reused till the end of the project and saved, no need to tear it down, it can be used again and again multiple times!
I will also reveal one more secret of brown color freezer paper, which really simplify the process!
Keep in touch and watch me in progress!

Happy sewing!


Natalie Quiltessa

Friday, January 1, 2016

Happy New Year!

Happy New Year to all my Quilting friends!


May you never run out of fabric!
May all your bobbins be always full!
May all your points match!!
May your rotary cutters never be dull

May all your UFOs be finished in 2016!!!


Thursday, December 10, 2015

Small sewing bag with suspended pockets. Tutorial now on Craftsy


 My bigger size of Quilters Sewing Bag (find the pattern on Craftsy) inspired me to improve it, add more pockets, a shoulder strap and an ironing pad,- so I designed Quilters Organizer Bag, which can be also found on Craftsy. The design of this bag also allows to insert the ruler UNDER the pockets, which made this bag very handy and convenient. Ironing pad with aluminized ironing board cover fabric inside, instead of regular lining, allows to use this bag when open flat for multiple small projects when miniature iron is involved, i.e. paper piecing, fusible applique, freezer paper etc.
Due to these easy to make zippered pockets and easy to attach double puller long zipper I really had a lot of requests to create the similar tutorial for the smaller bag, which makes sense, - so I did! Enjoy!


And now here are all three of them!

Happy sewing!

Natalie Quiltessa