Translate

Tuesday, January 26, 2016

How to sew on vinyl and leather. Great tips!


1) Use a Teflon-Foot. They sell one for every brand of machine. It’s usually a zig-zag presser foot that has a Teflon coating on bottom that allows things like vinyl and leather to slide right on through your machine. Heck, Baby Lock even makes one for their sergers! If you don’t have a Teflon foot, some people put cellophane tape on the sole of their foot- not quite as nice and neat- but it can work in a pinch.

2) Use this machine hack that includes mutilating a Supreme Slider. You can find it in my Quiltess.com store. If you don’t want to buy a Supreme Slider, you can put tissue paper underneath your project. I don’t really like doing this, because then I have to tear it away from my seam and it can dull your needle a bit. What you can do is tape the tissue paper to the bed of your machine, and then the vinyl won’t stick on the area of the bed to right or left of the needle, and you can just pay attention to the area around the feed dogs. The tissue paper basically acts as a barrier between the machine and the vinyl.

3) Use a longer stitch length. This doesn’t reduce drag per se, but it does help to preserve the integrity of your vinyl. Vinyl is plastic, it is a bonded, man made fabric- it’s not woven or knitted fibers and it won’t heal. So, if you puncture it with a needle very closely, you’ll perforate it and it could tear. Use a stitch length of at least 3 or 3.5

4) Don’t use a leather needle on vinyl! This is another piece of advice that the TV show gave. A leather needle has a blade-like tip that creates a large slit. This is great for leather, but on vinyl, it can create weak points. Use a “sharp” or “microtex” needle to create the smallest hole possible, while still piercing the fabric effectively.

5) Use strong polyester thread. Vinyl can sort of “cut your thread” as your garment or project wears, so use something like Mettler Metrosene thread. It’s strong and durable and will withstand the stress of holding vinyl together in a garment.


ps. I disagree with the statement from that article about NOT using baby powder, which can also be helpful if you just put a tiny amount of it on your fingers and rub the sewing plate. The only warning - do not sprinkle it on the sewing machine, just rub a little bit with your finger and it will reduce the stubbornness of leather or vinyl on the metal plate. Common sense! 

Happy sewing!

Natalie Quiltessa

Friday, January 22, 2016

Steve Hanks, watercolor artist

It's five years ago today when I wrote a post in my blog about one of my favorite watercolor artist Steve Hanks. If you like his paintings, you might want to read some about him.


 And yesterday (yes, just yesterday) I knew he passed away from cardiac arrest in April 2015.
So many months ago which I didn’t know of. So hard to believe…

Still enjoy his paintings. Now definitely want to purchase one for my bedroom.


And yesterday (yes, just yesterday) I knew he passed away from cardiac arrest in April 2015.
So many months ago which I didn’t know of. So hard to believe…

Still enjoy his paintings. Now definitely want to purchase one for my bedroom.

Tuesday, January 19, 2016

Pizza-pizza! From Farmer's basket

Farmer's basket: Pizza 18" diameter - 


Did you know that the color of your food, dishes, table linens and wall color can all have an affect on your appetite? Color has a significant impact on how appealing or unappealing a food is to you. Red food (as well as the color red itself) is appetite stimulating, creating feelings of intimacy and energy. Bring in some red into your kitchen! Having these tomatoes loaded pizza placemats works wonders! Enjoy your food! Enjoy your day with these colorful and appealing pizza placemats! 
Make them more for your friends and guests!


Happy sewing!

Natalie Quiltessa

Wednesday, January 13, 2016

Wish Flower (3 sizes pattern and tutorial) now on Craftsy


                Wish Flower is now on Craftsy in three different sizes - 12", 24" and 36" in diameter.


Hexagons have endless possibilities! It's not only traditional Grandmother's flower garden. Hexagon can be also broken into multiple pieces from the center making amazing layouts depending on different color combinations. 
In this tutorial I will explain how to work with this kind of pattern and how to put all these pieces together. I will also give you a tip how to eliminate the hassle of sewing multiple tine pieces in center (you can simply replace 4 of them by one!). 
I will also help you with the layouts, will show you how you can place several hexagons to make a quilt or table topper and how you can enlarge the size using sashing and borders.
In this tutorial I will also offer you 10 additional layouts and color combinations to help you visualize the finished product. You will be amazed how the changes in layout and colors can change the whole view and visual perception of these magic flowers! And of course, you can use your own color palette with this pattern! I will be glad to see your finished items here on Craftsy, on Facebook or even in personal message or email. As I have already mentioned - this block has endless possibilities!
Enjoy!
And Happy sewing!
Natalie Quiltessa


Tuesday, January 12, 2016

Friday, January 8, 2016

project in progress...

Look what I've done today!

I called this one Chocolate paradise.

And this one - Blue lagoon.


These are my favorite so far!!!

I got to make tutorial on this one! 

Happy sewing!

Natalie Quiltessa

Thursday, January 7, 2016

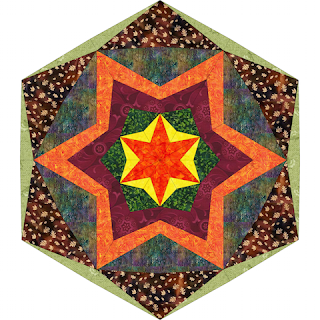
Alisa. My first pattern of new series is released!!!

I gave this block my sister's name. 
This is a paper piecing/foundation piecing pattern. If you've never done it before, you can find a lot of video tutorials on this technique to get better imagination how to work in this technique. Basically you just need to know how to make a simple straight stitch on your sewing machine and the instruction will guide you how to manipulate with it and make this beautiful block, which can be used as a single placemat or table topper, or as a beautiful wall hanging or a quilt if you make multiple blocks.

This pattern has multiple possibilities! It can be used as a single piece for placemats or in larger size as a tablecloth. If you choose to combine several blocks together, it can be sewn in a beautiful table topper, quilt or wall hanging.
You can use any kind of scraps and leftover triangular for this technique. You will need 8 colors your choice, 12 pieces of each color. The size of pieces depends on your pattern size preference. Print it out, cut the pieces, lay them out on the fabric and cut. This is a very friendly way of cutting fabrics! You can rearrange triangular again and again to find the best way of layout. 
Multi block folding triangular on freezer paper is my favorite technique. When you iron the pattern onto the fabric, it becomes firm and well stabilized, which makes it easier to manipulate with. Especially when working with small pieces and bias grain in multiple triangular, you don't have to worry about stretching the fabric and not matching points,- they match by default! I like to manipulate with patterns using this technique, the results are always unexpectedly beautiful and eye catching! In this tutorial I will explain how to prepare pattern and fabric for stitching together, how to choose layout for your ready product, how to adjust the size of ready table topper or a quilt.
The tutorial contains 12 pages of instructions which also includes 9 MORE COLOR COMBINATIONS for the same pattern! This will give you imagination how this block can look like in different colors. 


3 other files contain foundation pattern and templates for each piece in actual size. You don't have to print them all out. First, read the tutorial, pick the size you want to make and print out the pattern you need to work with.If you satisfied with the result and want to make the different size in another color, then print another pattern size! 
If you decide to leave it as is, make a sandwich, quilt it and finish with binding! If you want to keep going and make more of these blocks, keep going! But, please, don't leave them as UFOs! They need to be taken care of!
This block is followed by series of other similar type of blocks in my favorite multi block folding triangular on freezer paper technique. To be continued....

Happy sewing!

Natalie Quiltessa

Wednesday, January 6, 2016

My new project is growing!

Practicing every morning! One block a day!
Well, more than that, who cares!

Frappuccino with chocolate chips!
 White lily.


Stella.
 Carmen.


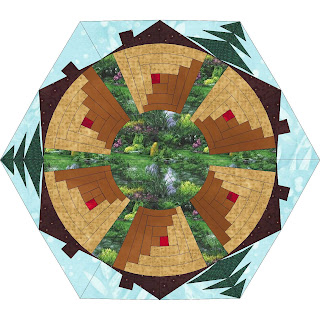
Good old log cabin digitized.